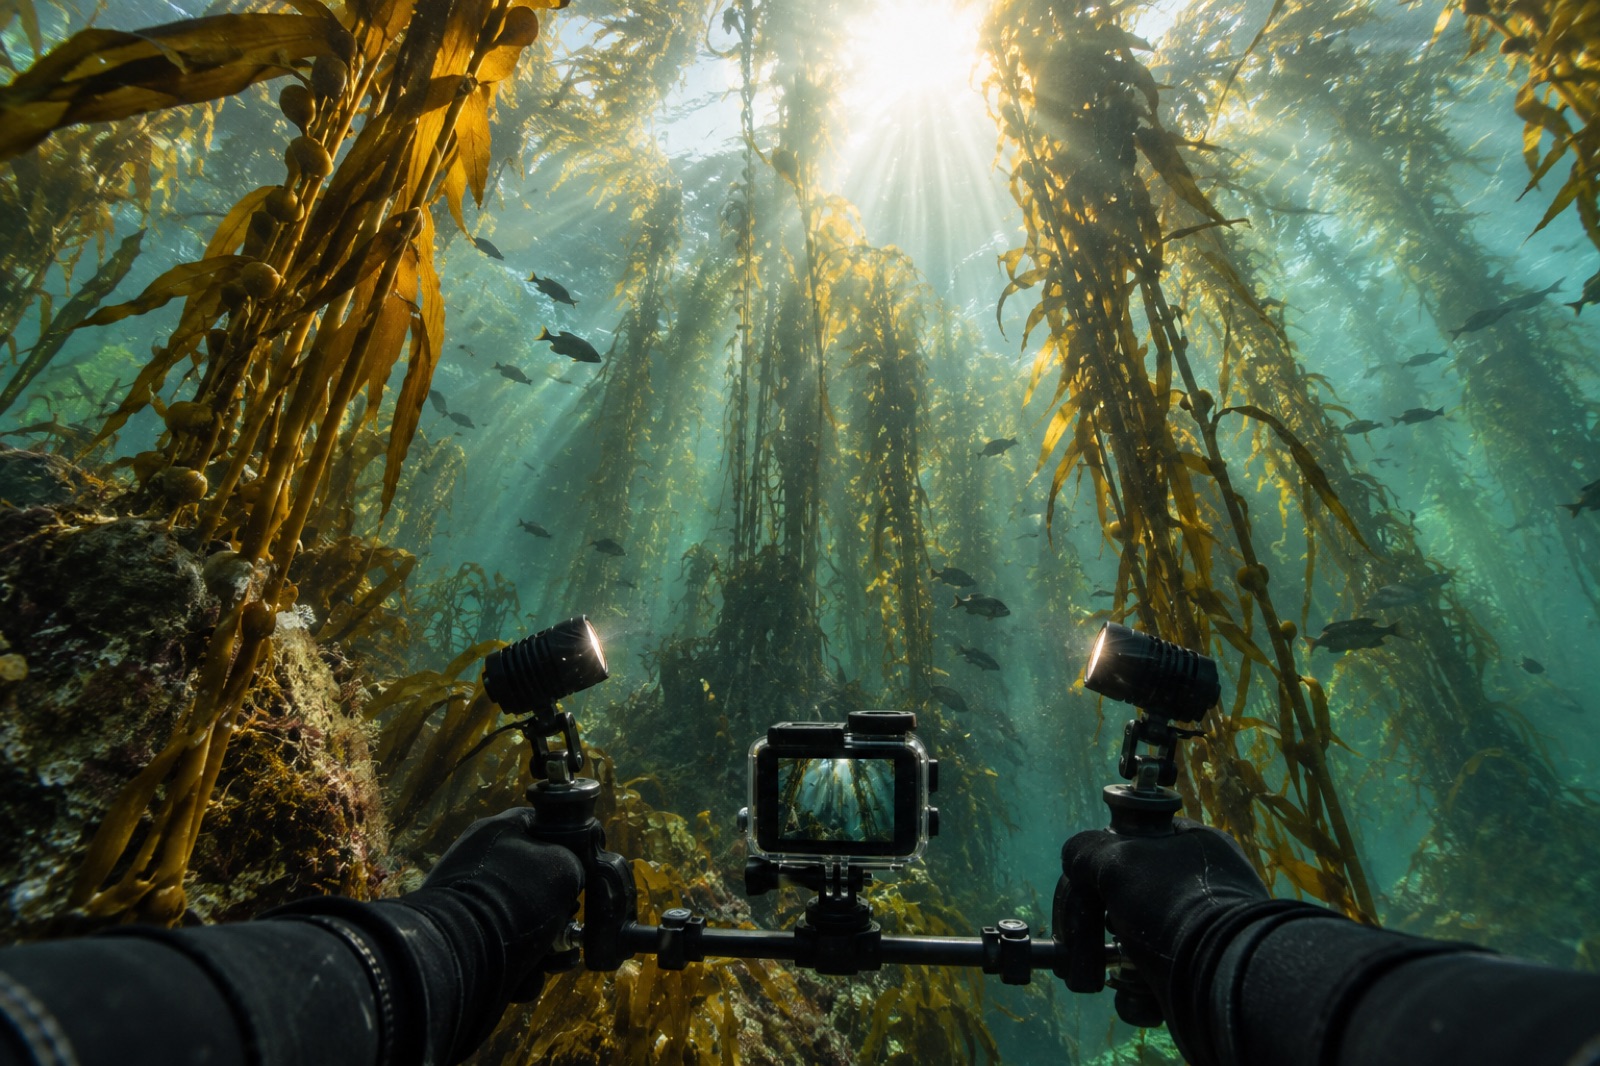
Kelp forest video fails in a specific, predictable way: you come home with forty minutes of wobbling green soup in which, somewhere, a seal definitely happened. The forest itself is not the problem — it is the most cinematic environment any diver can film, with cathedral light, moving architecture and wildlife that comes to you. The problem is that action cameras are engineered for bright surf breaks and handlebar mounts, while a kelp forest is dark, deep-filtered and demands slow, deliberate camera work. Fix the settings, add light, and slow everything down by a factor of three, and the same little camera starts producing footage you will actually edit.
This complements our stills-focused underwater photography in kelp forests guide; video wants its own workflow.
Camera settings: the boring setup that wins
Get these right on land, save them as a preset, and stop fiddling underwater.
Resolution and frame rate
Shoot 4K at 30 frames per second as your default, even if you intend to deliver in 1080p. The extra resolution buys you room to crop and stabilise in the edit — which, on footage shot from a moving diver, you will need. Reserve 60fps for moments of fast action (a baitfish school exploding, a seal fly-by) and 120fps only for deliberate slow-motion sequences; slow-mo at high frame rates starves the sensor of light, and kelp forests have little to spare.
Field of view: narrower than you think
Action cameras default to an ultra-wide "fisheye-ish" view that makes everything look distant and streaked at the edges. For kelp, use the Linear or medium field of view. The forest reads as towering columns and light shafts, not as curvature, and your subject fills more of the frame. Wide is for wrecks and whales; the forest wants intimacy.
Sharpness, colour and profile
- Set sharpness to low or medium. In-camera sharpening creates crunchy halos around every blade of kelp; you can sharpen in the edit, you cannot unsharpen in the camera.
- Use the camera's flat or log-style colour profile if you grade; otherwise use its standard profile and do your correction in-camera with a filter (below). Do not use the "vivid" modes — kelp green plus vivid saturation equals neon.
- White balance: at depths beyond a few metres, set it manually or lock it. Auto white balance hunts continuously as you rise and fall through the light column, giving you footage that bloops from blue to green to amber mid-take. Locked balance stays consistent enough to fix globally in the edit.
Exposure discipline
Protect the highlights. Sunbeams through canopy will blow out if you let auto-exposure chase the shadows; a blown beam is gone forever, while a dark stipe can be lifted. Slightly underexpose — a third to a full stop — and trust the edit.
Filters and lights: the two purchases that change everything
Water eats light selectively — red first, then orange and yellow — which is why everything below five metres turns blue-green on a naked sensor.
A red or magenta flip filter on the housing restores warm wavelengths in ambient light and is the single cheapest upgrade you can make. Use red in blue water, magenta in green temperate water (i.e., most kelp forests). Flip it off in the top few metres or everything turns lobster-pink.
Video lights beat filters once you are below about ten metres or working the dark understory. Two small lights on short arms, angled slightly outward to reduce backscatter from floating particles, transform close-up footage — suddenly the kelp is amber again and the sponges are orange. Key discipline: lights for the near field (within about an arm's length to two metres), filter and ambient light for the wide scenes. Trying to light a whole forest with torches gives you a lit blob in a dark tunnel.
Movement: shoot like a tripod that swims
Ninety percent of amateur underwater video is camera shake and sudden moves. The fixes are physical, not digital.
Trim is the camera platform. If you are fighting buoyancy, your footage wobbles with every kick and breath. Get horizontal, weighted right and genuinely neutral before you press record — if you need a refresher, the positioning drills in our freediving and buoyancy-focused dive guides transfer directly. Then add the camera-specific tricks:
- Use a tray and handles, not a bare camera on a stick. Two hands on a tray damps tremor enormously and makes slow pans possible. A grip is fine for selfies; it is terrible for cinema.
- Move at one-third the speed you think you should. Then halve it in the edit if needed — footage shot slow stays silky; footage shot fast can never be slowed convincingly at 30fps.
- Ten-second rule: every clip, hold a stable framing for at least ten seconds before moving. Editors (including future you) need handles.
- Let the forest move for you. Kelp sways, fish drift, light flickers — a locked-off camera in kelp is never boring. Resist the urge to pan. When you do move, move on a breath-hold (photographers' trick: bubbling regulators at the wrong moment shudder your feet and mess your framing; time your pushes to an exhale).
- Glide, don't kick. A slow frog-kick drift or a gentle pull through the water reads as a tracking shot. Flutter kicking reads as an earthquake.
Composition: three shots that build the story
Every good kelp sequence is built from a repeatable set.
The cathedral wide. Camera horizontal or tilted up, canopy overhead, sunbeams raking down. Shoot early in the dive when your tank is full and your patience is too. Best light midday with high sun overhead — see our season and light guide for kelp diving for when the water clears enough to make this shot sing.
The travel shot. A slow, stable glide along the forest floor or mid-column, kelp stipes passing in near-mid-far parallax. Keep one foreground element (a stipe, a rock edge) sliding through frame — parallax is what makes video feel three-dimensional at small screen sizes.
The behaviour shot. Park yourself off the reef, wait, and let the animals come. Sheepish wrasse, an octopus reshaping a den, a shark ghosting through the gap — behaviour beats everything, and it only happens when you stay still and let the forest stop noticing you. Review the approach distances and etiquette in our wildlife ethics guide; getting close by patience is filming, getting close by chasing is harassment.
If you want the small-stuff counterpart — nudibranchs, snails, juvenile fish — the techniques in macro photography in kelp forests apply to video too, just with continuous light instead of strobes.
Logistics: batteries, fog and card discipline
Cold water murders batteries. Carry spares in an inside suit pocket where your body heat keeps them alive, and swap at the surface interval, not when the low-battery warning appears mid-encounter.
Fogged housings ruin more dives than floods do. Anti-fog inserts in every dive, housing closed in air-conditioning or shade (never in humid direct sun), and never open it on a wet boat deck with salt spray flying.
Back on land: offload, rename, and back up the same day. Salt air and one corrupted card have ended entire expeditions. And log your dives with a note of what you filmed — in a season you'll thank yourself; if you're supplying footage to a citizen-science program or a monitoring crew like the ones behind Tidewright's (fictional) Canopy Ledger biodiversity surveys, timestamps and site names make your clips data, not just memories.
Key takeaways
- Shoot 4K/30 in Linear field of view, low sharpening, locked white balance, and slightly underexposed; save it as a preset and stop touching it underwater.
- A red or magenta filter fixes colour in ambient light; video lights own everything within arm's reach; do not try to light landscapes with torches.
- A two-handed tray, perfect trim and one-third speed turn wobble into cinema. Hold every shot ten seconds.
- Build sequences from three repeatable shots: the cathedral wide, the slow travel glide, and the patient behaviour wait.
- Warm batteries, dry housings, same-day backups. The edit starts with logistics.
FAQ
Is an action camera really good enough for kelp forests?
Yes, with caveats. Their small sensors struggle in the low light of deep temperate water, which is why the filter, lights and underexposure discipline matter. In the sunlit top ten metres of a kelp forest, a current action camera produces footage that holds up on any screen — the limit is usually the operator, not the sensor.
30fps or 60fps — which is better underwater?
30fps for most of the dive: it gathers twice the light per frame and produces motion that matches how the eye reads slow scenes. Switch to 60fps when you anticipate fast action you might slow down. Film an entire dive at 60fps in dim kelp light and you'll get noisy, starved footage.
Do I need video lights in shallow water?
No. Above roughly ten metres in clear conditions, a red/magenta filter does the job and lights mostly add backscatter from particles. Lights become essential deeper, on overcast days, and for any close-up work in the shaded understory.
The trio: two-handed tray (not a pole), genuinely neutral buoyancy and horizontal trim, and moving at a third of your instinctive speed. Digital stabilisation in-camera helps at 4K/30 but cannot rescue flutter-kick wobble.
What about audio?
There is almost none worth keeping — housings muffle everything to bubbles and clunks. Plan on replacing audio entirely: music, narration, or recorded topside ambience. The one exception is topside establishing shots of the coast, where a wind-muffled camera mic can catch usable wave sound.