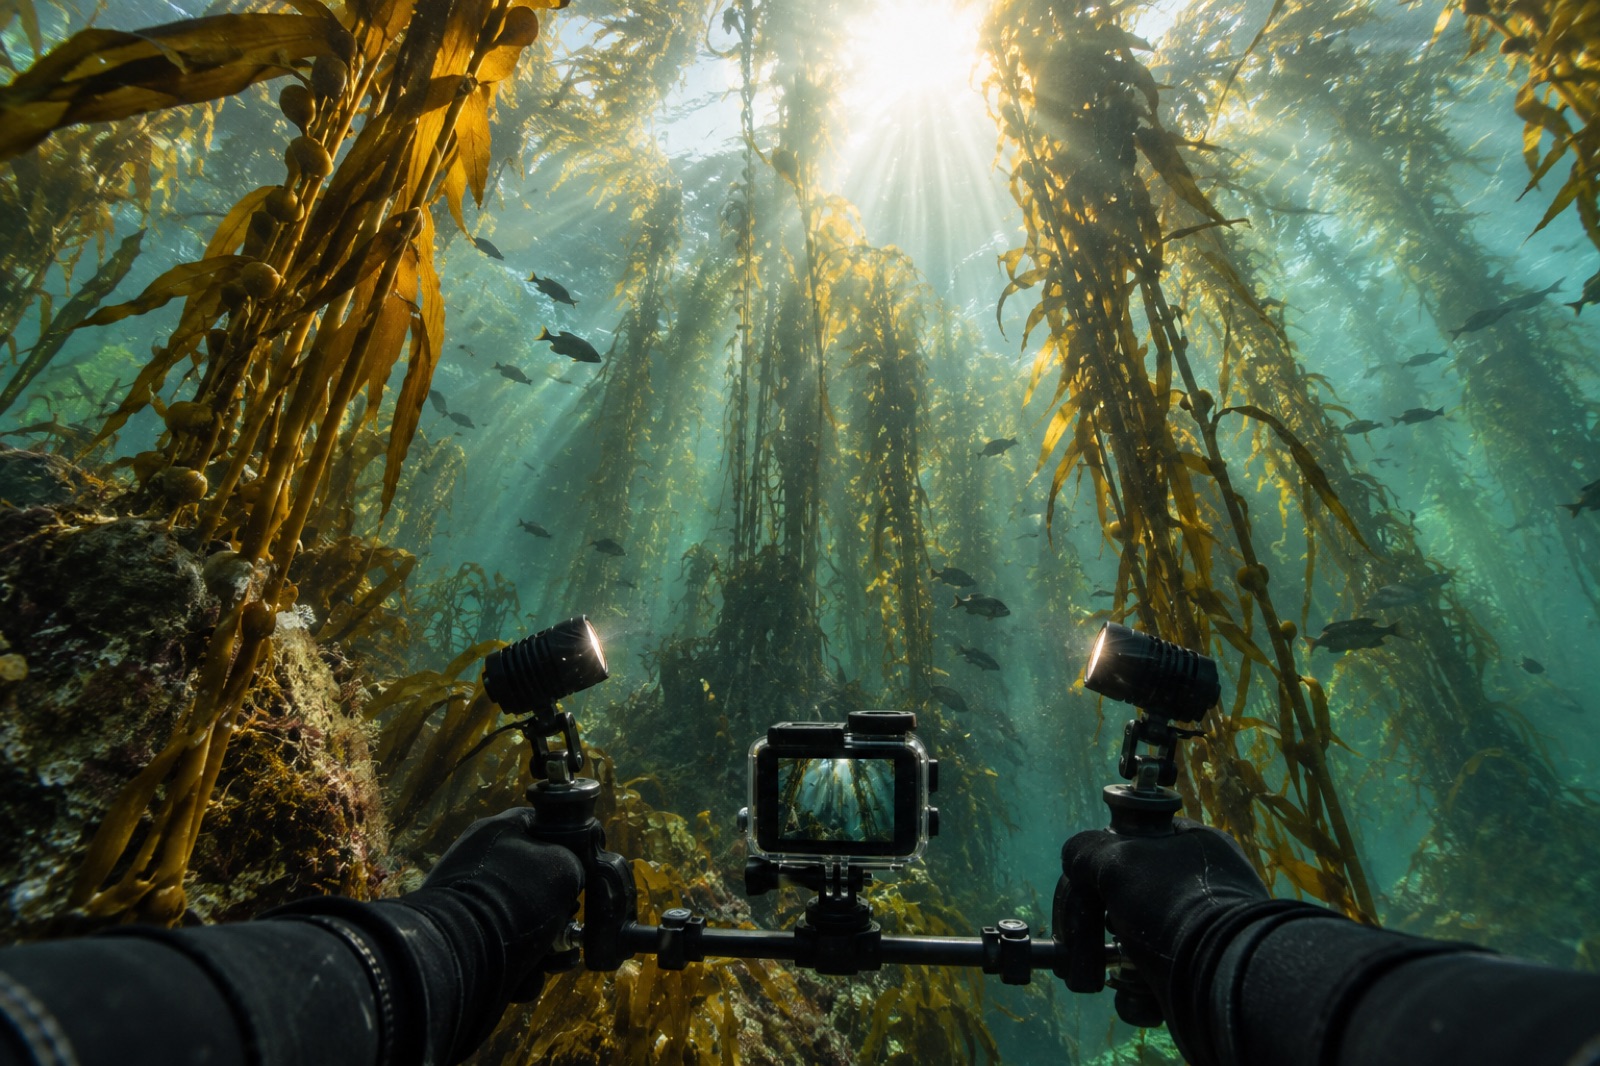
Stand in front of an underwater camera catalogue for the first time and you will meet a wall of acronyms, anodized aluminium and five-figure totals — most of it aimed at people who already know what they need. This guide is for the diver who doesn't. It explains what each piece of the system actually does (housings, ports, domes, strobes, video lights, trays), the physics that decides what you can compromise on, and a sane buying order — whether your goal is good photographs of kelp forest life or simply remembering what the forest looked like. For the artistic side once you're rigged, see our guides to underwater photography in kelp and macro photography.
Housings: the box that keeps the sea out
A housing is a pressure-proof case with mechanical or electronic linkages that let you operate the camera's controls from outside. Three honest tiers exist:
- Polycarbonate housings (Ikelite, SeaFrogs, Fantasea and similar) are the budget end: clear shells, honest controls, roughly 40–60 metre ratings. They work. They are bulkier and the control feel is mushier, but they open underwater photography to anyone with a compact or entry mirrorless camera.
- Aluminium housings (Nauticam, Aquatica, Isotta and kin) are milled, anodized, vacuum-checked engineering: 100-metre ratings, precise lever controls, and prices that reflect it. The upgrade you feel is control ergonomics — everything reachable without looking, with gloved hands — and durability over years of travel.
- The camera inside matters most of all. Beginners consistently invert this. A ten-year-old enthusiast camera with a good sensor in a sound housing makes better images than a new flagship camera handled through a cramped housing you can't operate. Buy the best housing you can for a camera you already understand.
Whatever the tier, the housing is a system with one enemy (salt corrosion) and one failure mode (a leak, usually at the rear O-ring). Aluminium needs thorough freshwater rinsing and periodic attention to anodizing nicks; polycarbonate needs sun protection and hinge care. Either will outlive the camera if maintained — or flood on dive one if a single hair crosses the O-ring.
Ports and domes: the optics problem
The housing is only a box; the port is where the lens looks out, and here the water argues with physics. Water has a refractive index close to the human cornea and camera glass — which is why a flat pane in front of a lens narrows its angle of view: light bends at the air–water boundary, making everything appear about 25 percent closer and effectively cropping your lens. That magnification can help (macro) or hurt (wide angle).
- Flat ports are simple optical windows. They narrow the field of view slightly (the refraction effect above), which is why housings pair them with macro lenses where the crop is a feature.
- Dome ports place a curved optical dome in front of the lens. Correctly sized and positioned — the dome's centre of curvature matched to the lens's entrance pupil via the right port extension — a dome restores your wide-angle lens to its in-air field of view underwater. This is why every serious wide-angle reef and kelp photograph comes off a dome. Small domes are sharp in the centre and mush at the edges; big domes (200 mm+) are sharper across the frame and better for over-under shots.
- Wet lenses skip matching entirely: wide-angle correction lenses and macro wet diopters screw onto or flip over a port, making compact-camera rigs startlingly capable. They're the budget route into both wide and macro.
Mated correctly, dome edges, extension lengths and lens charts are a vendor-provided lookup, not a guess; ignore the chart and you get corners like Vaseline.
Light: strobes, video lights, and backscatter
Ambient light disappears fast — reds gone by about five metres, most colour gone by ten. Bringing light with you is what separates flat blue-green memory from the living forest.
- Strobes (Inon, Sea & Sea, Ikelite and similar) fire a bright, brief, daylight-coloured flash. Constant-position arms let you place the light; light that comes from beside or above the subject, at an angle, rakes across it and shows texture — and keeps the light cones away from the water column between you and the subject, which is where backscatter lives. Light the subject, not the water. Strobes connect by fiber-optic (most compact and mirrorless rigs, triggered off the camera's own flash) or electrical sync cord (the professional standard, more reliable, more delicate).
- Video lights (Weefine, Kraken, Keldan and others) put out constant light. They are indispensable for video, double as focus lights, and are the friendlier purchase at the start because what you see through the viewfinder or mask is what you get. Their limits are power — you're fighting the sun's filtering effect at any distance — and the spooky ambient weakness in kelp shade and low-visibility water, where a strobe's burst wins.
- TTL vs manual: TTL (through-the-lens automatic exposure) via fibre optic is a real gift in moving kelp conditions, where subject distance changes with every surge. Manual power control rewards practice at constant distances. Modern strobes do both.
Trays, arms and the ergonomics nobody photographs
The unglamorous hardware is what makes a rig usable. A tray under the housing plus handles lets you carry the system two-handed — steadier than your camera strap arm, better for video, and easier to pass to a boat crew. Ball arms and clamps give the strobes reach; float arms, or foam fitted to them, restore lost buoyancy, because a big rig is often a kilogram heavy in the water: dead-handling in surge, fatigue on the wrist, and ruined pictures. Aim for neutral and neutral-trim — level, no nose-dive — so the rig hangs in the water column at your shoulder ready to shoot. In kelp, keep lanyards tucked and the rig clipped during entries and exits: loose cameras and kelp stipes have an entanglement romance nobody orders.
Battery kits are also part of ergonomics: strobe rechargeable batteries, desiccant inside the housing and a habit of charging everything the night before. A flooded battery compartment is the second most painful way to learn the maintenance chapter.
The maintenance that saves the camera
This is the section experienced shooters check for in a guide before they trust it:
- Inspect the O-ring on every opening — magnifier if needed. One hair, one sand grain, and the sea arrives. Light silicone grease on the manufacturer's schedule; remove and clean rings routinely.
- Freshwater soak after every dive day — buttons worked under rinse water to flush salt from shafts, then a full dry before opening anything.
- Open housings dry, in still air. Towel off, hands dry, body between rig and splash. The bathroom at a beach shower is how cameras drown on land.
- Never leave the rig in a hot car — heat expands the air inside, weakens seals and fogs optics, and a hot housing meeting cold water invites condensation exactly where you can't wipe it.
- Travel with spares: O-rings, grease, sync cords, and the desiccant that tells you moisture snuck in before it tells the camera.
A sane buying path
The honest order of operations for a kelp-forest photographer starting from zero:
- A camera you know + a housing that fits it, plus tray and handles. Shoot ambient light around the kelp canopy for months. This is 90 percent of the instruction.
- One strobe on an arm, manual-first. Learn placement discipline — the single biggest quality jump in a shooter.
- A dome when wide-angle becomes the plan, or a wet lens on a compact rig for the same effect at the fraction of the price.
- Second strobe or a video light depending on whether the trip is photography or trip-memory-led — for action-camera and compact shooters, our action-camera video tips pair well here.
- Better arms, floats, cords. Then, and only then, complain about the camera.
Buying in that order means you never own gear you can't yet exploit, and the expensive upgrade arrives after you know what you're trying to do in the water.
Key takeaways
- A housing, fitted for a camera you already know, is the foundation; aluminium buys ergonomics and depth rating, polycarbonate buys access. Either floods without O-ring discipline.
- Dome ports restore wide lenses to their in-air field of view; flat ports crop toward macro. Vendor lens-and-extension charts are not optional reading.
- Light is the big quality variable: position strobes to rake across subjects and away from the water between lens and subject; video lights are the beginner-friendly constant light and indispensable for video.
- Trays, handles, ball arms and especially float arms exist to make the rig neutral and level in your hands — the invisible hardware behind steady work.
- Buy in stages: housing first, one strobe second, optics third, backups and luxuries last.
FAQ
Can I take my phone or action camera into a kelp forest instead?
Yes, and in shallow sunlit kelp the results can be lovely — especially with an add-on tray and handle for stability. The limitations arrive at depth: ambient-only colour turns blue-green, and small sensors struggle in kelp shade. Start there by all means; know you'll want light and a bigger sensor as the ambition grows.
Is a vacuum leak detector worth it?
Emphatically yes on any aluminium housing. A hand-pump vacuum holds green before a dive and screams when a seal shifts — a cheap insurance against the single most expensive failure in the sport. Many polycarbonate housings offer valve versions too.
What strobe power do I need?
For kelp forest work at close range in ambient-assisted light, mid-range strobes are plenty; firepower matters more for wide scenes in shade and for lighting anything at a distance. Backscatter control comes from placement: a mid-power strobe deployed correctly beats a monster pointed at the water column.
How do I keep the rig from tangling in kelp stipes?
Clip the rig to yourself between shots, keep lanyards short and stowed, and move deliberately through the canopy with one hand free for the forest. Buoyancy skills first, camera second — the kelp suffers a rough pass long after the snap is forgotten.
What maintenance actually prevents leaks?
Inspect, clean and lightly grease O-rings on schedule; rinse and work all controls in fresh water after diving; open housings bone-dry indoors; never leave any rig in heat; and never travel without spare rings, grease and cords.