Farming11 min read
Making Seed String: From Spore Release to Nursery Lines
Seed string is the kelp farm's starter crop. This step-by-step guide covers sorus collection, spore release, inoculation density, incubation and out-planting.
Naomi Reyes ·
A technician's guide to kelp spore settlement onto seed string: sorus selection and spore release, density targets, tank hygiene, light and temperature, and common failures.
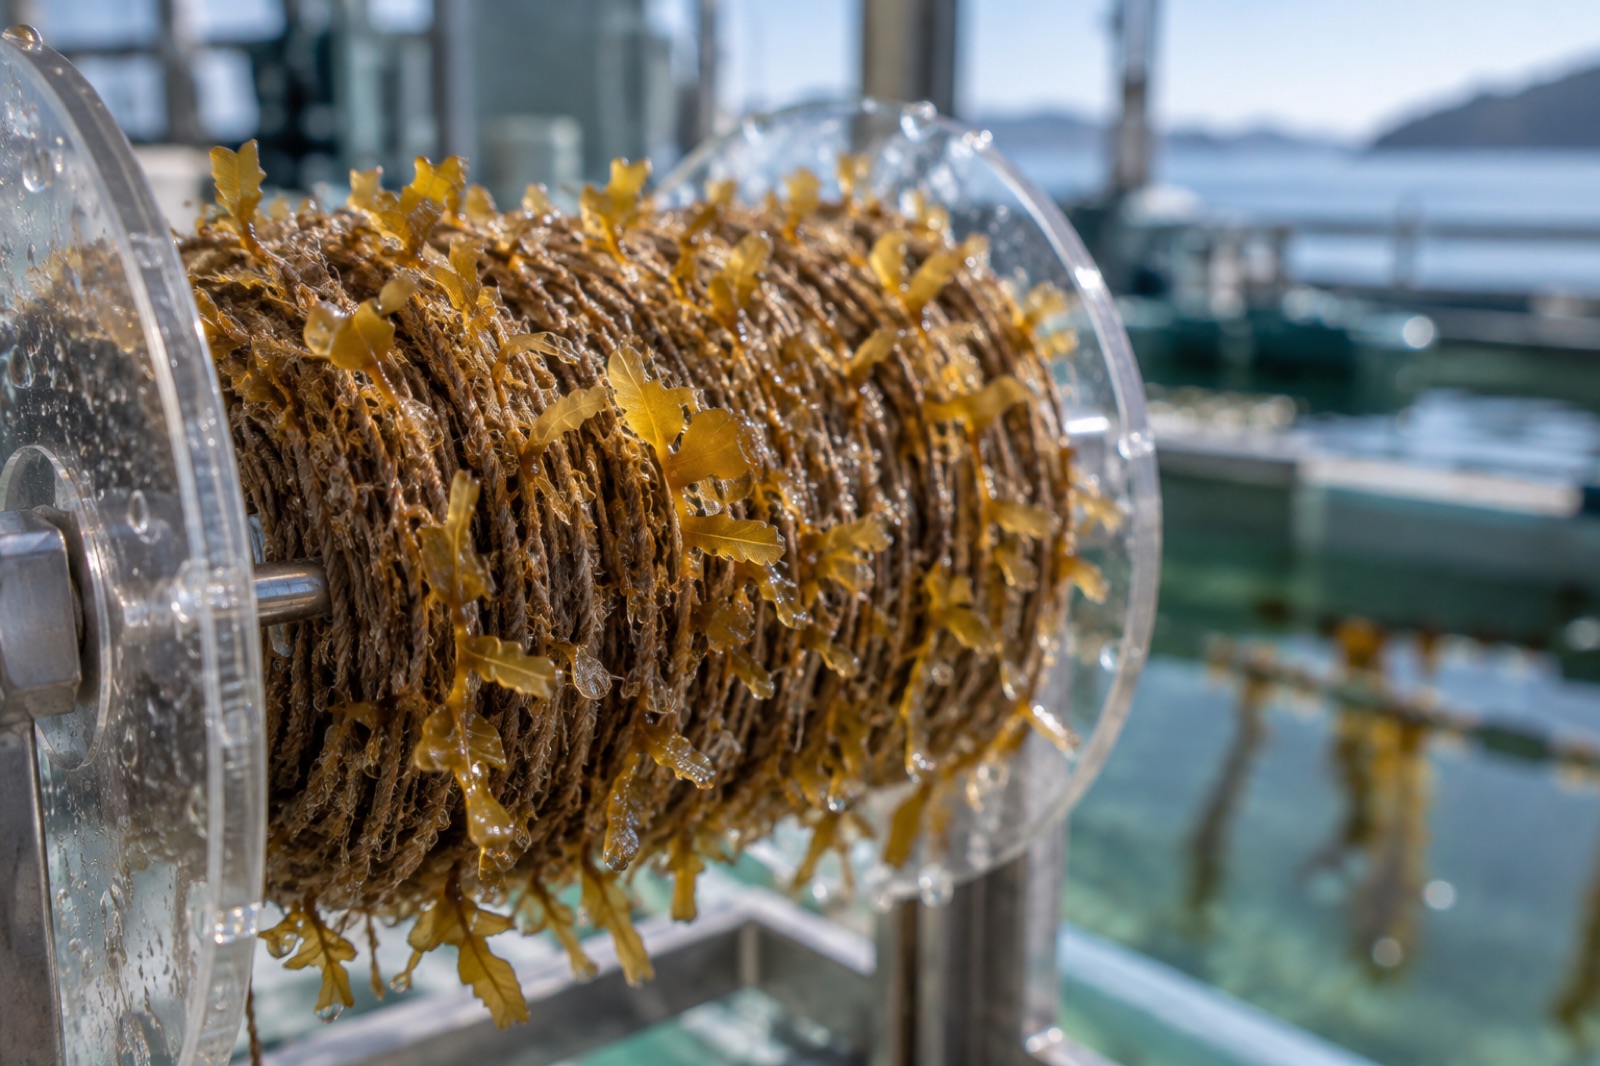
Every kelp farming season, before any line touches the ocean, a hatchery has to pull off one of the quieter miracles in aquaculture: persuade billions of microscopic swimming spores to stop swimming, attach to a twine thinner than your finger, and start dividing. Settlement is the hinge the whole season swings on — get it right and the rest of the nursery period is routine husbandry; get it wrong and no amount of open-water skill will rescue the season. This article is a working guide to the settlement step: how sorus tissue is chosen, how spores are released, how dense to seed, how to run settlement tanks, and the failure modes that catch new hatcheries.
Establishing young kelp on seed stock is, mechanically, a three-act play: release spores from fertile parent tissue, hold them in water with the twine until they attach, then raise the attached microscopic germlings until the twine can go to sea. Each act depends on the last. Settlement — the middle act — is the least forgiving, because it's where biological behaviour and engineering meet. You're asking a motile spore, evolved to choose rock with exquisite pickiness (Biofilms and Settlement Cues covers that pickiness), to choose twine instead. Hatcheries that master their settlement protocol master most of the nursery problem; those that don't spend their seasons wondering why their lines come back thin.
The practical season starts in the water, with fertile tissue. The basics:
Species- and provenance-appropriate parents. Collect fertile sorus tissue (or whole fertile plants) from the wild population you're permitted for, and matched as closely as possible to where the crop will grow. Genetics choices made at collection travel with the line all season; the principle is laid out in Native Seedstock Rules.
Ripeness judged on the bench, not the calendar. Mature sorus is dark, swollen and slightly mucilaginous; wipe a corner with a finger and a ripe patch releases a visible rust-brown smear of spores. Overripe tissue releases mostly mucus and microfauna; green tissue releases little. Experienced collectors label each parent separately, because spore quality varies plant-to-plant even on the same dive.
Clean, cold transport. Sorus rides back chilled, dark and damp — never soaking in sea-water buckets where it rots anaerobically by lunchtime. Blot dry, wrap, cool-box it flat.
Standard technique for most kelp species is a mild desiccation shock followed by re-immersion. The parent tissue air-dries (usually on clean towelling in a cool, shaded room) for an hour or more; when it's plunged back into chilled, filtered seawater, the returning turgor triggers mass spore release, often within minutes, visibly clouding the water.
A few craft rules worth the ink:
The development sequence after settlement — spore, germling, gametophyte, young sporophyte — is covered biologically in Kelp Gametophytes and the kelp life cycle, and the overall seed-string method in Making Seed String. This article stays at the workbench.
How many spores per litre, for how long? Short answer: enough, briefly, and moving. Dense, well-motored spore suspensions settle onto bare twine within a few hours, and most hatcheries run settlement windows in the range of a few hours to overnight. Beyond that window you're no longer gaining kelp attachment — you're gaining everything else that wants the twine. A few grounded practices:
Seed concentrated, circulate gently. Slow stirring or a low airlift keeps spores in uniform suspension against the twine without providing so much shear that attached germlings are sloughed off.
Favour twine contact over water clarity. Twine is best spread in shallow trays or wrapped around frames that can be lowered through the spore suspension; you want every centimetre bathed equally.
Stop at the window. When the bulk of spores have spent their swimming, drain, rinse gently, and move the seeded twine to clean culture water. Lingering in release water adds bacteria, fungi and ciliates — the beginnings of the contamination battle.
Post-settlement, the young germlings are at their most sensitive. Culture conditions for most temperate kelps in this phase are conservative:
When settlement fails, it almost always fails in one of a small number of recognisable ways:
Twine comes back bare or nearly bare. Spore quality, spore quantity or exposure. Verify parent ripeness at collection; use a hemocytometer count of the spore suspension as routine QC if you have a microscope, so density is a number not a hope; extend the settlement window next time.
Twine starts dense, then clears. Contamination. Diatoms, bacteria and ciliates outcompete young germlings within days in dirty water. Audit filtration, sterilisation, and every bucket in the chain; check nutrient media hygiene; review the twine's own storage history. Twine should arrive sterile-packaged and stay that way.
Settlement works, nursery phase fails. Not a settlement failure. The crossover is usually a water chemistry, temperature or photoperiod problem in the subsequent weeks — look upstream, not at the settlement step itself.
The broader nursery craft after settlement is covered in Setting Up a Seaweed Hatchery; the point here is only that settlement deserves its own protocol, its own record sheet, and its own autopsy when it fails.
For your own wall above the settlement bench:
None of this is exotic. It is plumbing and patience. But behind every kelp forest rising on a farm line in autumn is a hatchery that ran exactly these steps quietly the previous spring — and got the spores to stick.
Hours. Kelp spores are short-lived swimmers; release-to-settlement should happen the same day, and ideally within hours. There is no meaningful shelf life for a spore suspension, which is why release and seeding are scheduled as one continuous operation.
The big temperate farm kelps — sugar kelp, kombu, oarweed, wakame — all follow the same basic desiccation-release-settlement pattern, with differences in timing, temperature and ripeness cues by species. Tropical and red seaweeds obey different rules entirely; the protocol in this article is a temperate-kelp protocol.
You can run a season without one, but you're settling blind. Even a modest bench microscope lets you verify release, estimate suspension density and check day-3 germling attachment — three of the most useful numbers in the whole hatchery. Budget for one before you budget for any other upgrade.
Open-water direct seeding exists as a research frontier — drone sprayers and line-winding machines have been trialled — but control, cleanliness and repeatability still belong to the hatchery. Direct seeding, when it matures, will likely rely on hatchery-verified suspensions anyway; the settlement craft doesn't disappear, it moves location.
Dirty twine, dirty water — a hygiene failure, every time. Settlement is a competition you are staging between your kelp and every microbe in the building. The hatcheries that treat the settlement room with near-operating-theatre discipline are the ones whose lines come back dense.
Seed string is the kelp farm's starter crop. This step-by-step guide covers sorus collection, spore release, inoculation density, incubation and out-planting.
Naomi Reyes ·
A practical guide to building a small kelp hatchery: culture room design, seawater systems, equipment, budgets and the weekly workflow that produces seeded twine.
Naomi Reyes ·
Kelp gametophytes are demanding housemates. Learn the temperature, light, filtration and nutrient regimes that keep seed cultures healthy until out-planting.
Naomi Reyes ·