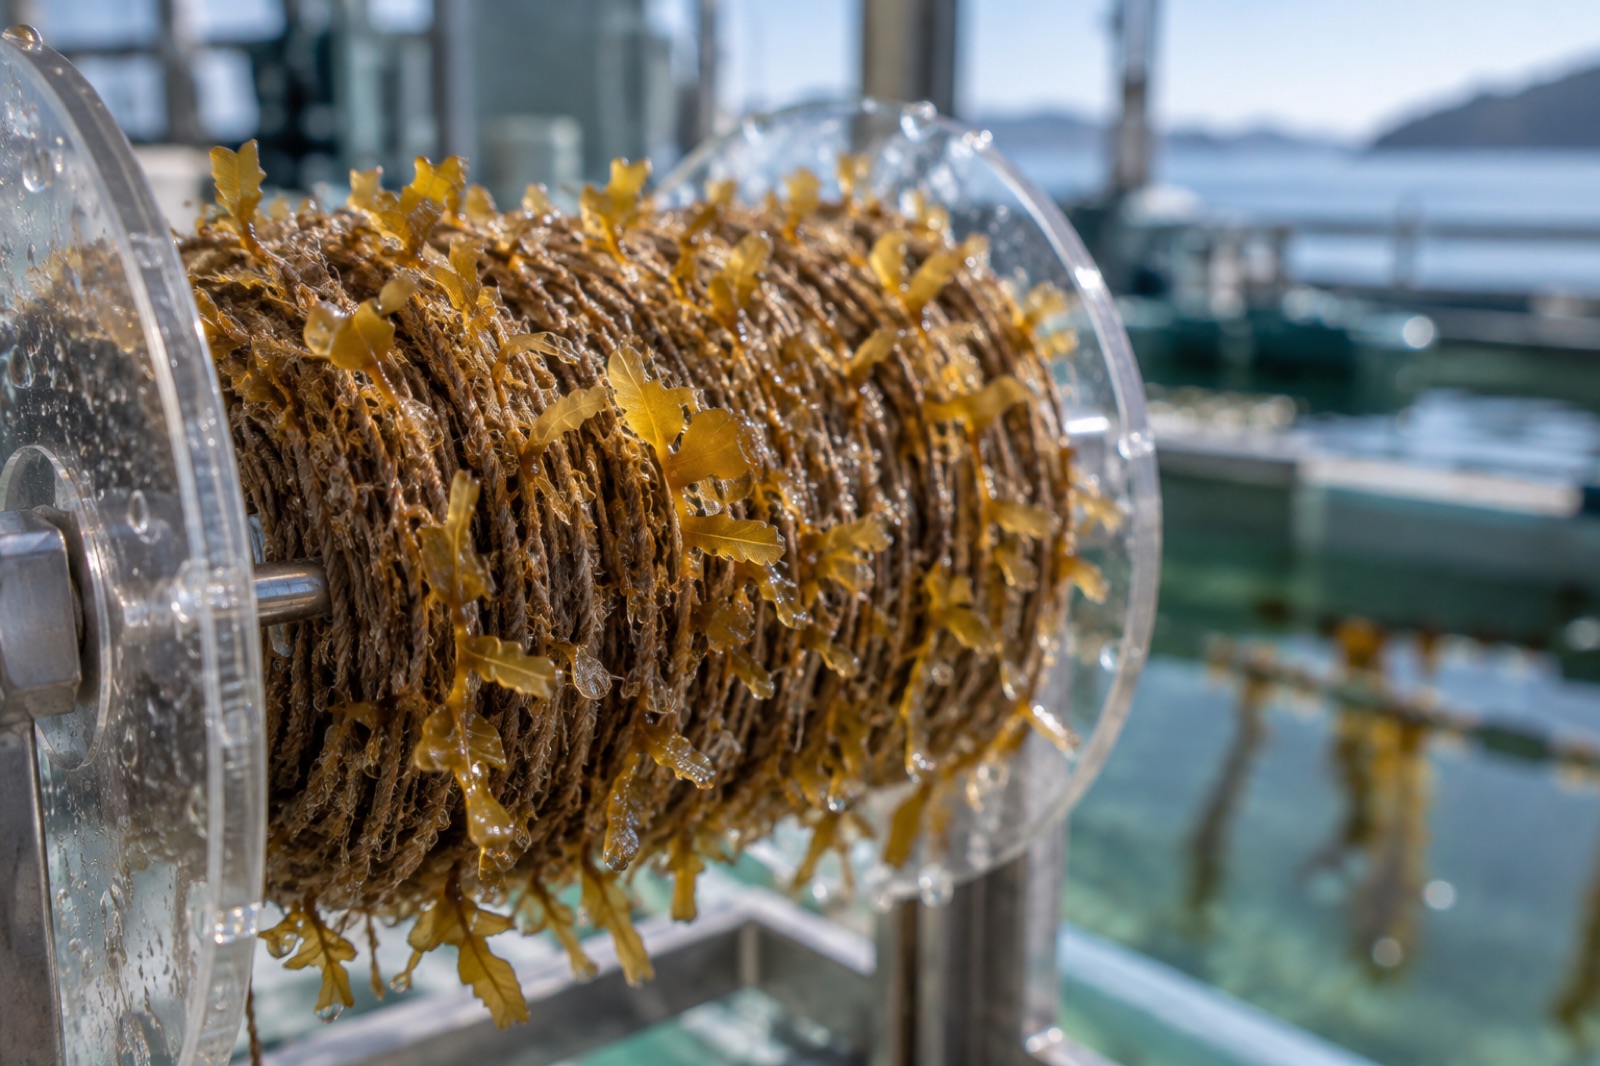
Every kelp longline starts life as something you could wrap around your wrist: a few metres of thin twine, fuzzed with brown growth so fine it looks like a stain. That twine — seed string, seeded cord, or "seeded line" depending on regional vocabulary — is the most valuable few grams of material on a seaweed farm, and the easiest thing in the whole production chain to quietly get wrong.
This guide walks the full workflow used by working kelp hatcheries: selecting and collecting fertile parent tissue, releasing spores, inoculating twine at the right density, incubating it through the fragile early weeks, and finally moving it outdoors. It assumes you have — or are planning — hatchery facilities of the kind described in Setting Up a Seaweed Hatchery, with water quality management as covered in Hatchery Water Quality for Kelp Seedstock.
What seed string actually is
Seed string is thin cord — typically 1–3 mm in diameter, made of texturised polyester, nylon, or biodegradable natural fibres — wound onto a PVC or acrylic spool frame, then colonised by young kelp. The goal at out-planting is a twine densely covered in sporophytes roughly 1–4 mm long: big enough to see, small enough that you haven't wasted hatchery months growing them.
The spool format matters. Wound twine presents a short, manageable object for the hatchery, and at the farm it unspools and spirals around the main grow-line so the young sporophytes already interlock with the farm's rope matrix. Different regions have different conventions (some use flat "kura" tabs or woven seed mats), but the physiology underneath is identical: you are growing a wild species through its two-stage life cycle on demand, in a box.
Step 1: Collect fertile parent tissue
Kelp produces spores on a sorus — a patch of closely packed sporangia near the base of the blade (in Laminaria species) or as a distinctive darker, raised band (in Saccharina). Your seed stock is only ever as good as this tissue, so treat collection as a genetics decision, not a logistics errand.
- Collect locally, broadly. Take sori from many plants at your target site or a site with matching conditions — the aim is a spore slurry carrying the local population's genetic breadth. Tidewright's own principle of local provenance, described in our work on kelp genetics, applies just as much to commercial seed: genes matched to the site outperform imported varieties after the first bad summer.
- Confirm fertility. A mature sorus is darker, slightly swollen, and scrapes with a waxy feel. Immature blades fail; over-mature ones have already discharged.
- Timing follows the species. Sugar kelp in the North Atlantic sorus-ripen in late summer and autumn; kombu runs a winter calendar. See Sourcing Kelp Seed Stock for regional timing windows.
Transport the tissue cold and wrapped in damp (freshwater-damp, not seawater-sopping) cloth in the dark. You want to delay spore release until you are ready, and warm, dry sori dump their spores early.
Step 2: Induce spore release
Spore release is triggered by mild stress: the plant thinks it is dying and votes to reproduce. The classic sequence:
- Clean the sorus — wipe away epiphytes with a soft cloth dipped in sterile seawater.
- Dry-slow it. Wrap the sorus in damp paper towel and refrigerate (roughly 4–10 °C) overnight in the dark.
- Re-immerse and agitate the next morning in full-strength filtered seawater at hatchery temperature. Within 15–60 minutes you should see the water turn faintly smoky-brown: millions of motile zoospores.
Strain the suspension through 100–250 µm mesh to remove shed tissue, and you have your working spore slurry.
Counting the invisible
Spore density determines everything downstream. Count on a haemocytometer under a microscope (about 400× works well): dilute a drop of slurry until a manageable number of spores fit the grid, count, and back-calculate spores per millilitre. Aim for reproducibility over elegance — two counts and an average beat one heroic count.
Step 3: Inoculate the twine
Wind your cord tightly onto clean spool frames and sterilise them (autoclave, or dilute bleach followed by several sterile-seawater rinses). Then inoculate by immersing the frames in spore slurry, or by gently spraying the spooled twine.
Target density is consistently the most-searched number in this craft: most hatcheries aim for a final settlement of roughly 2,000–5,000 spores per square centimetre of twine surface. Compute backwards from your slurry density, the twine surface area on the frame, and the bath volume. For reference purposes only — a 2 mm cord wound on a 30 × 30 cm frame with 3 mm pitch has on the order of 6,000 cm² of surface, so a slurry bath needs at least tens of millions of spores.
Settlement takes 24–72 hours. Keep the bath still, dim and cool during settlement — flow knocks spores off their landing sites before they can adhere and germinate.
Step 4: Incubate the gametophyte generation
This is the slow, quiet phase that decides the farm. Spores germinate into filamentous gametophytes embedded along the twine fibres, and they will sit there, maturing, for the next several weeks.
- Temperature: hold at the cool end of the species' comfort band — for temperate kelps, 8–12 °C.
- Light: dim, 10–30 µmol photons m⁻² s⁻¹. Do not hurry them with bright light.
- Water: changed weekly, filtered and lightly enriched at induction stage.
- Watch weekly under the microscope. Sacrifice a 2 cm piece of twine from each frame. You are looking for female gametophytes to produce their large, stalked eggs, and — shortly after — the first faintest brown ghosts of embryonic sporophytes.
If reproduction is stubborn, the usual levers are a temperature tweak of a degree or two and a shift to blue-enriched light with a shortening photoperiod — the natural cues that biology has wired into this species.
Step 5: Grow the young sporophytes
Once embryos appear, the game changes. Sporophytes want more of everything:
- Light: ramp to 40–80 µmol m⁻² s⁻¹.
- Nutrients: full-strength enrichment is appropriate now; juvenile sporophytes are voracious.
- Motion: a gentle aeration or slow rocking motion keeps filaments from shading each other and waters from stratifying.
Target transplant size is about 1–4 mm blades. At 1 mm nearly every settled spore has survived; at 4 mm you have spent weeks of hatchery capacity for growth you could buy for free in the sea. Incubation calendars of four to ten weeks from inoculation to out-planting cover most farms, split by climate and species roughly as follows:
| Phase |
Duration (typical) |
Key events |
| Spore release and settlement |
1–3 days |
Slurry prep, inoculation, dark settlement |
| Gametophyte maturation |
3–6 weeks |
Microscopic monitoring, blue-light induction |
| Early sporophyte growth |
2–4 weeks |
Nutrient ramp, hardening |
| Nursery acclimation |
1–2 weeks |
Outdoors, flowing raw seawater |
Step 6: Nursery acclimation and out-planting
Abrupt transition kills seed that has been coddled for two months. The nursery phase trades the controlled flask for flowing seawater tanks — ideally at an actual coastal site.
- One to two weeks of acclimation in flowing, filtered-natural seawater, full outdoor light (shade cloth for the first days), natural temperature.
- Unspool onto grow-lines in the calmest hour available. Seed string is wrapped in a spiral along the main cultivation rope at a pitch that gives each juvenile sporophyte eventual room (usually 5–15 cm depending on target density).
- Deploy at the farm within days. The first week is the mortality peak: check lines at days 2 and 7, photograph the twine, count.
This handover from hatchery bench to open water mirrors the production logic behind Tidewright's own Holdfast nursery system: local genetics, high-density seedstock, hardened nursery lines, and a handoff to field operations that treat each batch as a programme, not a parcel.
Troubleshooting: the failures you will actually meet
- No settlement — your sori were immature, over-mature, or mishandled in transport. Re-collect.
- Settlement but no germination — shock between slurry and bath (salinity, temperature, or chemistry mismatch). Match, and try again.
- Gametophytes, no sporophytes — insufficient maturation time, wrong light regime, or (more rarely) a slurry that settled nearly all-male or all-female by chance. Give them another fortnight under induction conditions.
- Sporophytes, then mass loss at week 6–8 — the toxic club: usually a contamination bloom outcompeting juveniles. Review water quality and filtration, not nutrient formulas.
- Good sporophyte growth, total failure after out-planting — almost always deployment timing: too early against warm autumn water, or too late against winter storms. This is a seasonality and calendar problem rather than a hatchery one.
Key takeaways
- Seed string is grown, not bought: five distinct phases from sorus collection to out-planting, each with its own setpoints.
- Collect fertile sori from many local plants; your seed's genetics are chosen the day you snorkel, not the day you culture.
- Count spores on a haemocytometer and target roughly 2,000–5,000 settled spores per cm² of twine.
- Keep incubation dim, cool and patient — rushing gametophyte maturation is the classic false economy of kelp farming.
- Visible sporophytes of 1–4 mm, plus a week of outdoor acclimation, are the minimum viable transplant size.
- Out-planting kills more good seed stock than any hatchery failure; time it against the seasonal calendar, not the production calendar.
FAQ
How much seed string do I need per farm line?
A typical rule of thumb for sugar kelp on standard longlines is a spiral wrap giving roughly 30–50 juvenile sporophytes per metre of main line. In practice most farms produce seed string to over-supply by 20–30% to allow for uneven settlement between frames. Work the calculation from your target plants per metre and observed hatchery density per centimetre of cord.
Can I store seed string?
Not really at the seeded stage — it is alive and ageing. What you can bank is the earlier stage: refrigerated gametophyte cultures, literally grown in flasks, keep for months and can be seeded to twine on demand. That is why serious seed-stock programmes build gametophyte libraries in cold rooms as their core asset.
Do I need a licence to collect sorus tissue from the wild?
In most jurisdictions, yes — wild marine plant collection, broodstock transfer, and genetic movement across bioregions are variously regulated under fisheries, biosecurity and environmental law. Check before collection, not after. It is the cheapest compliance you will ever buy.
Why did my twine turn green?
Green means Ulva or another opportunist outcompeted your kelp during a phase of weak kelp growth — the fridge wasn't cold enough, or the bath was too rich and stayed too warm. Greens are faster than kelp in hatcheries. Cool down, reduce enrichment, and cull frames where green exceeds brown.
What is the difference between "direct seeding" and twined seed?
Direct seeding injects spore inoculant onto farm lines in the water using a spray or a coated tube — fewer hatchery weeks but far lower and less controllable settlement. Twined (spooled) seed costs hatchery time but delivers known densities. Most commercial farms use twined seed; direct methods are interesting for restoration-scale deployment where cost per metre dominates.