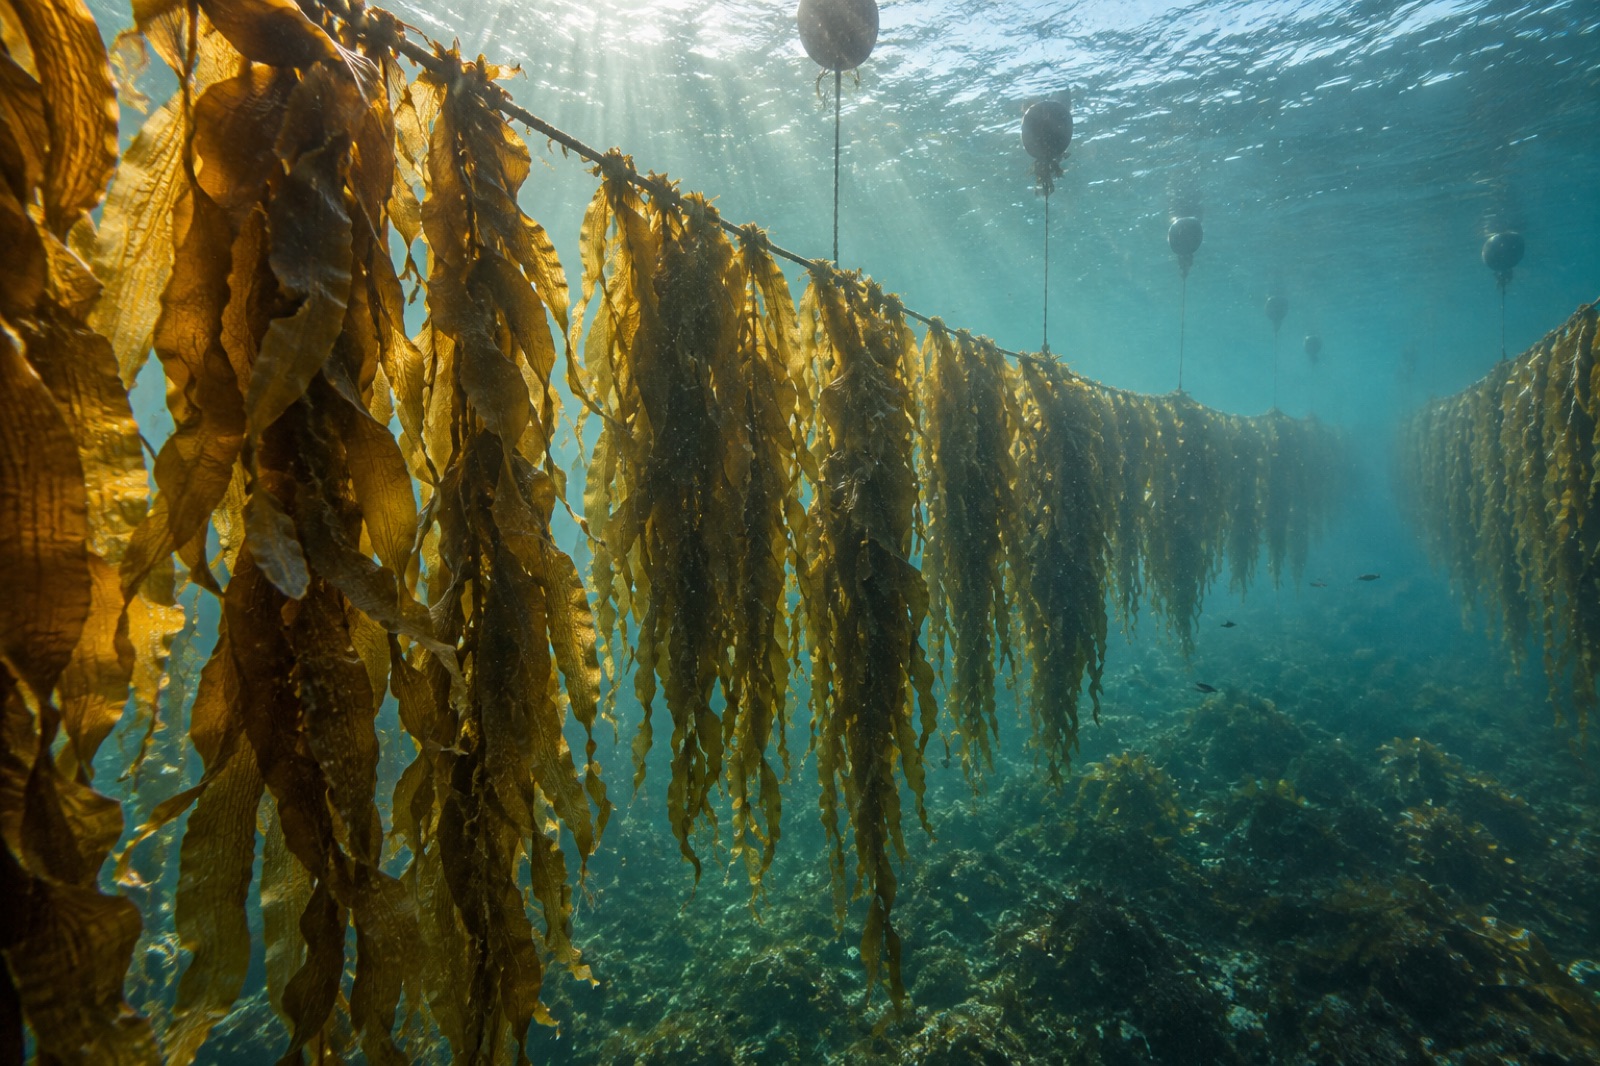
Sugar kelp (Saccharina latissima) is the workhorse of cold-water seaweed farming in both the North Atlantic and the North Pacific: fast-growing, resilient, edible, and forgiving enough for beginners while interesting enough to keep veterans busy. But it is an annual crop on a strict clock, and the single biggest source of first-season failure is doing the right task two months late. This guide walks the entire cycle in order — summer broodstock work, autumn seeding and outplanting, the dark winter of slow growth, the spring sprint, and the harvest window — so the timing lives in your calendar rather than in your good intentions.
For the species-level background — biology, morphology, site requirements and competitive context — read this alongside our species farming guide for sugar kelp and the sugar kelp encyclopaedia profile. Here we focus narrowly on when, and on what each season's decisions cost you if they slip.
The Shape of a Sugar Kelp Year
Sugar kelp is a classic winter annual in farmed settings. The wild rhythm — spores released in autumn, microscopic gametophytes developing over winter, blades appearing in spring — is what farming compresses and steers. A working farm calendar looks like this:
| Season |
Farm task |
The stakes |
| Early summer |
Collect sorus tissue from wild broodstock |
Sets the genetic base of the whole crop |
| Mid to late summer |
Hatchery: spore release, seeding, gametophyte nursery |
Contamination here ruins everything downstream |
| Early autumn |
Outplant seeded lines |
Too early: heat stress. Too late: a short crop |
| Winter |
Monitoring, light husbandry, patience |
Fouling and storm losses accumulate quietly |
| Early spring |
Growth sprint begins; final checks |
Nitrogen falls, blades race, epiphytes wake up |
| Late spring |
Harvest |
A window measured in weeks, not months |
Local variation is real — a farm in Norway runs weeks behind a farm in Brittany, and an Alaska farm behind both — but the order never changes. Everything else in this article hangs off that sequence.
Early Summer: Broodstock and Sorus Collection
The crop you harvest next spring begins now, on a wild reef. Sugar kelp produces its sorus tissue — dark, thickened patches of sporangia on the blade — through summer in most regions. You collect fertile blades from parent kelp that show the traits you want: length, width, delayed sorus formation (late-maturing parents are valued because they stretch the harvest window), and clean, healthy tissue.
Practical notes:
- Collect broadly. Take fertile tissue from many individuals across a site rather than stripping a few plants. It both protects the wild bed and captures genetic diversity — the insurance policy against a bad hatchery run.
- Stay local, and check the rules. Many jurisdictions regulate collection and movement of broodstock precisely because genetics matter. Our piece on native seedstock rules explains why local provenance is both an ecological and legal question.
- Handle tissue cold and fast. Sorus sections go into cool, filtered seawater, out of direct sun, and into the hatchery the same day where possible.
If you are buying seeded line from a hatchery instead of running your own, this season is when you place the order — good hatcheries book out. Either way, read sourcing kelp seed stock before you commit.
Late Summer: The Hatchery Run
This is the highest-skill phase of the year and the one most beginners outsource. The sequence, compressed: sorus tissue is cleaned and induced to release spores; spores settle onto your seed string (typically 1–2 mm twine wrapped around spools); and over the following weeks the microscopic gametophytes grow, become fertile, and produce embryonic sporophytes — baby kelp, a millimetre or two tall, attached to the twine.
The science behind it is genuinely elegant — kelp has two alternating generations, one microscopic — and our explainer on the kelp life cycle is worth your time. The farm-level essentials are temperature, light and cleanliness:
- Temperature usually sits around 10–13 °C for sugar kelp gametophytes; every degree of drift costs development time.
- Photoperiod and light level control the pace of gametophyte growth versus fertility; hatchery managers tune both to have sporophytes ready for your outplant date, not two weeks after it. See hatchery light cycles for the detail.
- Contamination is the season-ender. Diatoms and bacteria love the same conditions your gametophytes do. Filtered, sterile-managed water and discipline about what enters the culture room are not optional refinements; they are the job. Our guide to hatchery water quality covers the working protocol.
Before outplanting, verify the seed is actually ready — dense coverage of visible sporophytes, not just settled spores. The checks are laid out in kelp seed viability testing.
Early Autumn: Outplanting
The aim is simple: get seeded string into the ocean after the summer heat has broken but with enough autumn left for the sporophytes to establish before winter. In practice this is a judgment call driven by your site's temperature record — many farms outplant when sea temperature drops through roughly 13–15 °C. Go in during a warm spell and you can cook the whole crop; wait too long and the plants never reach first-year size.
The mechanics: the seed string is either wrapped directly around the grow-line or unwound and transferred onto it, typically at spacing matched to your seeding density plan. Lines hang at 1–3 m depth on a standard longline array. Two outplant-week disciplines pay for themselves:
- Keep the plants wet and shaded on the deck. Sporophytes that spent four hours dry in the sun are a write-off you will spend months staring at.
- Log every line. Which spool, when deployed, at what depth. In March, when some lines are thick and others bare, your outplanting log is the only diagnostic tool you have.
Winter: The Quiet Months
From the surface, nothing happens for months. Underwater, the juvenile sporophytes are centimetre-scale, growing slowly in dim light, hardening to your site. Winter farm work is husbandry and weather:
- Fouling management. Hydroids, bryozoans and competing algae settle on lines all autumn. Plan a cleaning pass before the spring sprint; fouled lines shade and smother the blade base. See managing biofouling on kelp longlines.
- Storm inspection. Winter is when moorings earn their keep. After every significant blow: confirm the array's position, check lines for chafe, replace floats that have gone under. A December repair is twenty minutes; a January failure is the crop. Our storm-proofing guide covers the design side.
- Underwater checks. Monthly dives or camera drops to estimate blade length and density give you the growth curve you'll harvest against.
Spring: The Sprint and the Window
This is why people farm sugar kelp. As day length extends, the crop accelerates spectacularly — daily blade growth of a few per cent is common in good conditions, with blades reaching one to four metres. Simultaneously, seawater nitrate typically crashes, epiphytes and fouling organisms bloom, and by early summer the blade quality for food use declines: thinner tissue, higher epiphyte load, sometimes the beginnings of sorus formation.
So the harvest is a window, not a date, and you harvest quality, not just biomass:
- Watch the blade, not the calendar. Colour, thickness, epiphyte load and your buyers' specs decide the day, and different buyers close the window at different points — a biostimulant customer will take weeks older kelp than a salad-grade customer will.
- Pull in one push if you can. Sugar kelp is usually clear-cut, whole blades cut from the line. Staging the harvest over a fortnight exposes late-cut lines to the season's decline.
- Respect the first six hours. Fresh kelp degrades fast at ambient temperature; ice, shade and speed are the difference between food grade and compost. Our harvest logistics guide and the piece on harvest timing go deep on both.
After the Lines Come Up
Strip, clean and service the gear immediately — our off-season maintenance guide covers the checklist — and debrief while the season is fresh: which lines performed, which hatchery batch lagged, whether the harvest window caught you short-staffed. And if you're selling the crop, remember that the funnel from wet blade to paying buyer is its own discipline; selling your seaweed and the cold chain guide close the loop from this article to the payday.
Growers who want comparative context — a second crop on the same moorings, a different clock — should look at wakame, which runs a similar Atlantic cycle with a warmer-water twist: see growing wakame.
Key takeaways
- Sugar kelp farming is an annual cycle that starts in early summer with broodstock collection — the spring crop is decided nearly a year before harvest.
- Outplanting timing is the highest-leverage single decision: after summer heat breaks, early enough for autumn establishment, guided by your own temperature record.
- The hatchery phase is about temperature, photoperiod and sterility; viability-check the seeded string before it leaves for the farm.
- Winter work is fouling control, storm inspection and quiet underwater monitoring — the sprint is won in the slow months.
- The harvest is a quality window of weeks, not a biomass date; watch blade condition and buyer specs, and honour the first six hours after cutting.
- Log everything — spools, lines, dates, growth checks. A sugar kelp farm is small enough that your records are your entire research programme.
FAQ
How long does sugar kelp take from seeding to harvest?
Count roughly nine to twelve months from spore release to harvest, depending on your latitude: weeks of hatchery culture, an autumn outplant, a slow winter, and a spring growth sprint that ends in a harvest window of typically two to six weeks. The underwater grow-out itself — outplant to harvest — is usually six to nine months.
What depth should sugar kelp lines hang at?
Most farms run grow-lines at one to three metres below the surface — deep enough to avoid wave beating and ice scour, shallow enough for the light sugar kelp wants. Very sheltered, sediment-prone sites sometimes go deeper to escape turbidity; exposed sites sometimes go deeper to duck the worst of storm chop. Your site's clarity is the deciding variable, so measure light rather than copying a neighbour's number.
Can I farm sugar kelp in warm water?
Not really. Sugar kelp is a cold-water species; sustained temperatures much above about 18–20 °C cause stress, and summer heat will kill an outplanted crop that went in too early. In warmer regions, farmers pivot to species with warmer affinities — wakame at the edge of its range, dulse in systems that allow it, or warmer-water reds.
How much can one hectare of sugar kelp produce?
Published farm figures vary enormously with site, spacing and year — from single-digit tonnes fresh weight to well over 50 tonnes per hectare in strong cold-water sites — so treat any single number with suspicion. What matters operationally is tracking your own lines' yield per metre season over season; our piece on seaweed yield benchmarks explains how to read published figures honestly.
Do I need my own hatchery to farm sugar kelp?
No. Many excellent farms buy seeded spools or string from commercial hatcheries and focus their skill on the ocean phase. A hatchery adds control — genetics, timing, cost at scale — but also adds a whole second discipline. The common path is outsourced seed for the first seasons, then an in-house nursery once volume justifies it; tank versus open-water nurseries compares the options when you get there.